
UPDATE: More photos have been added at the end of the post.
A few months ago Sound Mixer Superstar @ChrisPolczinski posted on Facebook about a new RF Scanner he was using. He had bought a USB TV Tuner meant for a Windows computer and was using it on his Android phone. Immediately everyone online fell into 2 categories; those eager to try it and those who were skeptical of it’s accuracy to do a good job. And there is something to be skeptical about, RF Scanners are typically $200 – $300 standalone devices. But being a skeptical person but also falling into the category of people who wanted to try it, I bought one for myself.
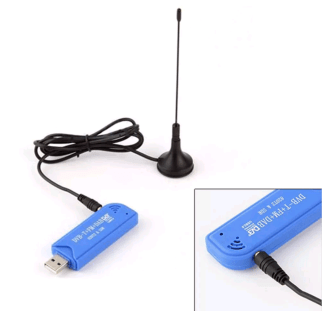
I purchased mine at a local surplus electronics parts retailer. The place typically sells all the things required to build circuit boards but will carry the occasional random electronic. I spent $20 for mine, but on eBay they can be had for $8-10. The key factor when you search for these USB RF Scanners is to make sure the unit uses the RTL2832U chip. Most do use this, but some don’t. The reason is that someone actually wrote an Android Driver for the RTL2832U so that these USB dongles can be used with your phone. Now there is also software drivers for MAC and PC, but most sound mixers don’t carry a full on laptop with them to set. But for those are are BOOM RECORDER based, this would be a perfact addition to your cart setup.
You can download the Android Driver HERE.
A demo of the app you will use to do the RF Scans can be downloaded HERE.
For the full version of the app you can purchase a serial key for $10 HERE.
In Order to use it on an Andriod phone you will need a Female USB to Male Micro USB adapter like this one HERE. And a cellphone/tablet that has OTG support. Sadly the $49 Kindle Fire does not have OTG support dispite being build on the Andriod 6.0 platform. I am getting to the point where I use so many apps while working that I am looking for a Android based tablet that I can dedicate to my sound kit. Most Samsung and LG phones now offer OTG support.
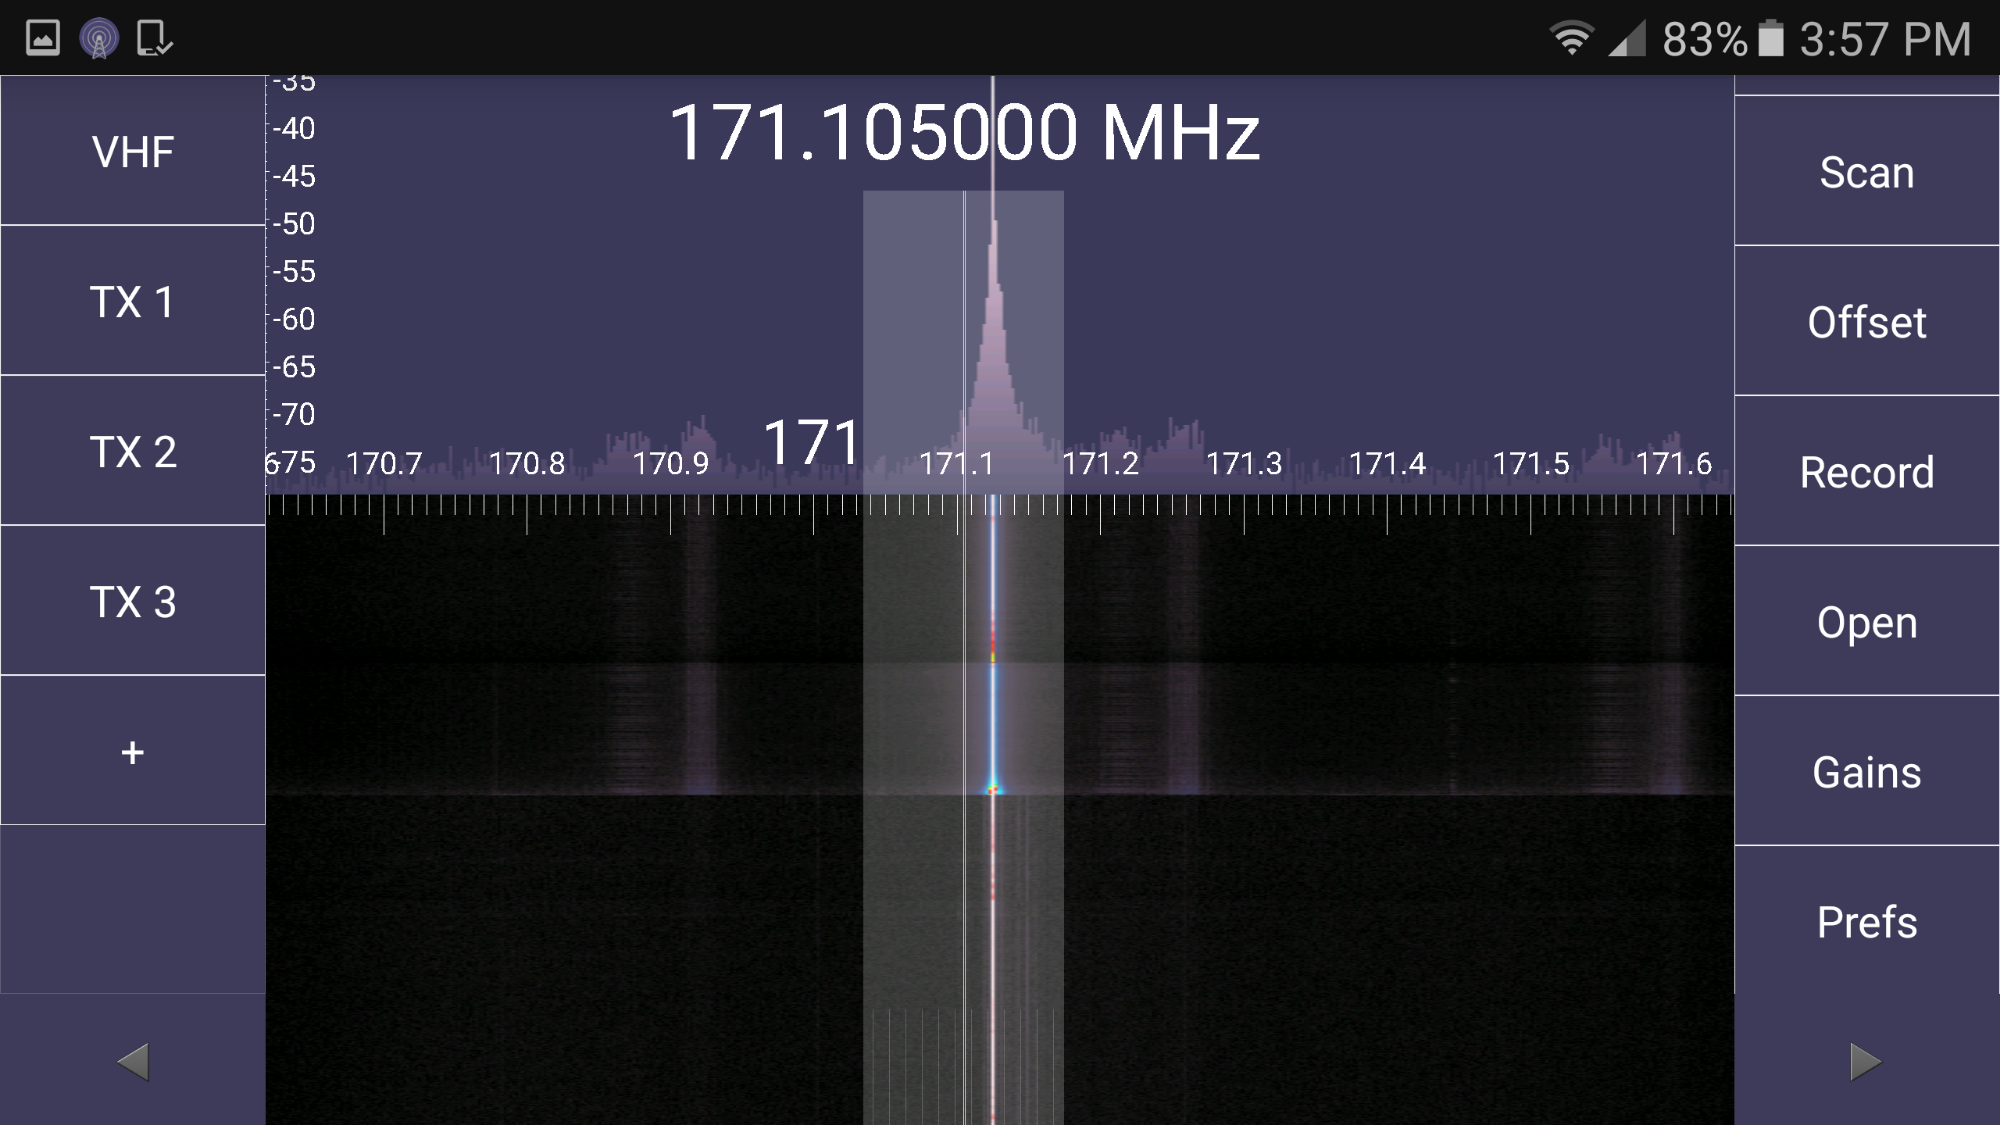
 So to test the unit I gathered and borrowed ever audio transmitter I could get my hands on and started to power them on. I played around with different frequencies to see how close to the actual frequency my RF Scanner was to the real one my transmitters were putting out. I used crystal based VHF units to digitally tuned UHF units. I even tuned into my local FM stations to see just how wide the range a simple $10 USB RF Scanners really has.
Quickly during the test I started to notice some results.
- The VHF Lectrosonics are badass! They produce a very very narrow bell curve for a signal; making it very easy to slide that signal between other signals that would normally give RF interference to a lesser wireless kit. I contacted Karl at Lectrosonic about this observation and he spoke to how well the front in tracking on the older analog VHF units was.

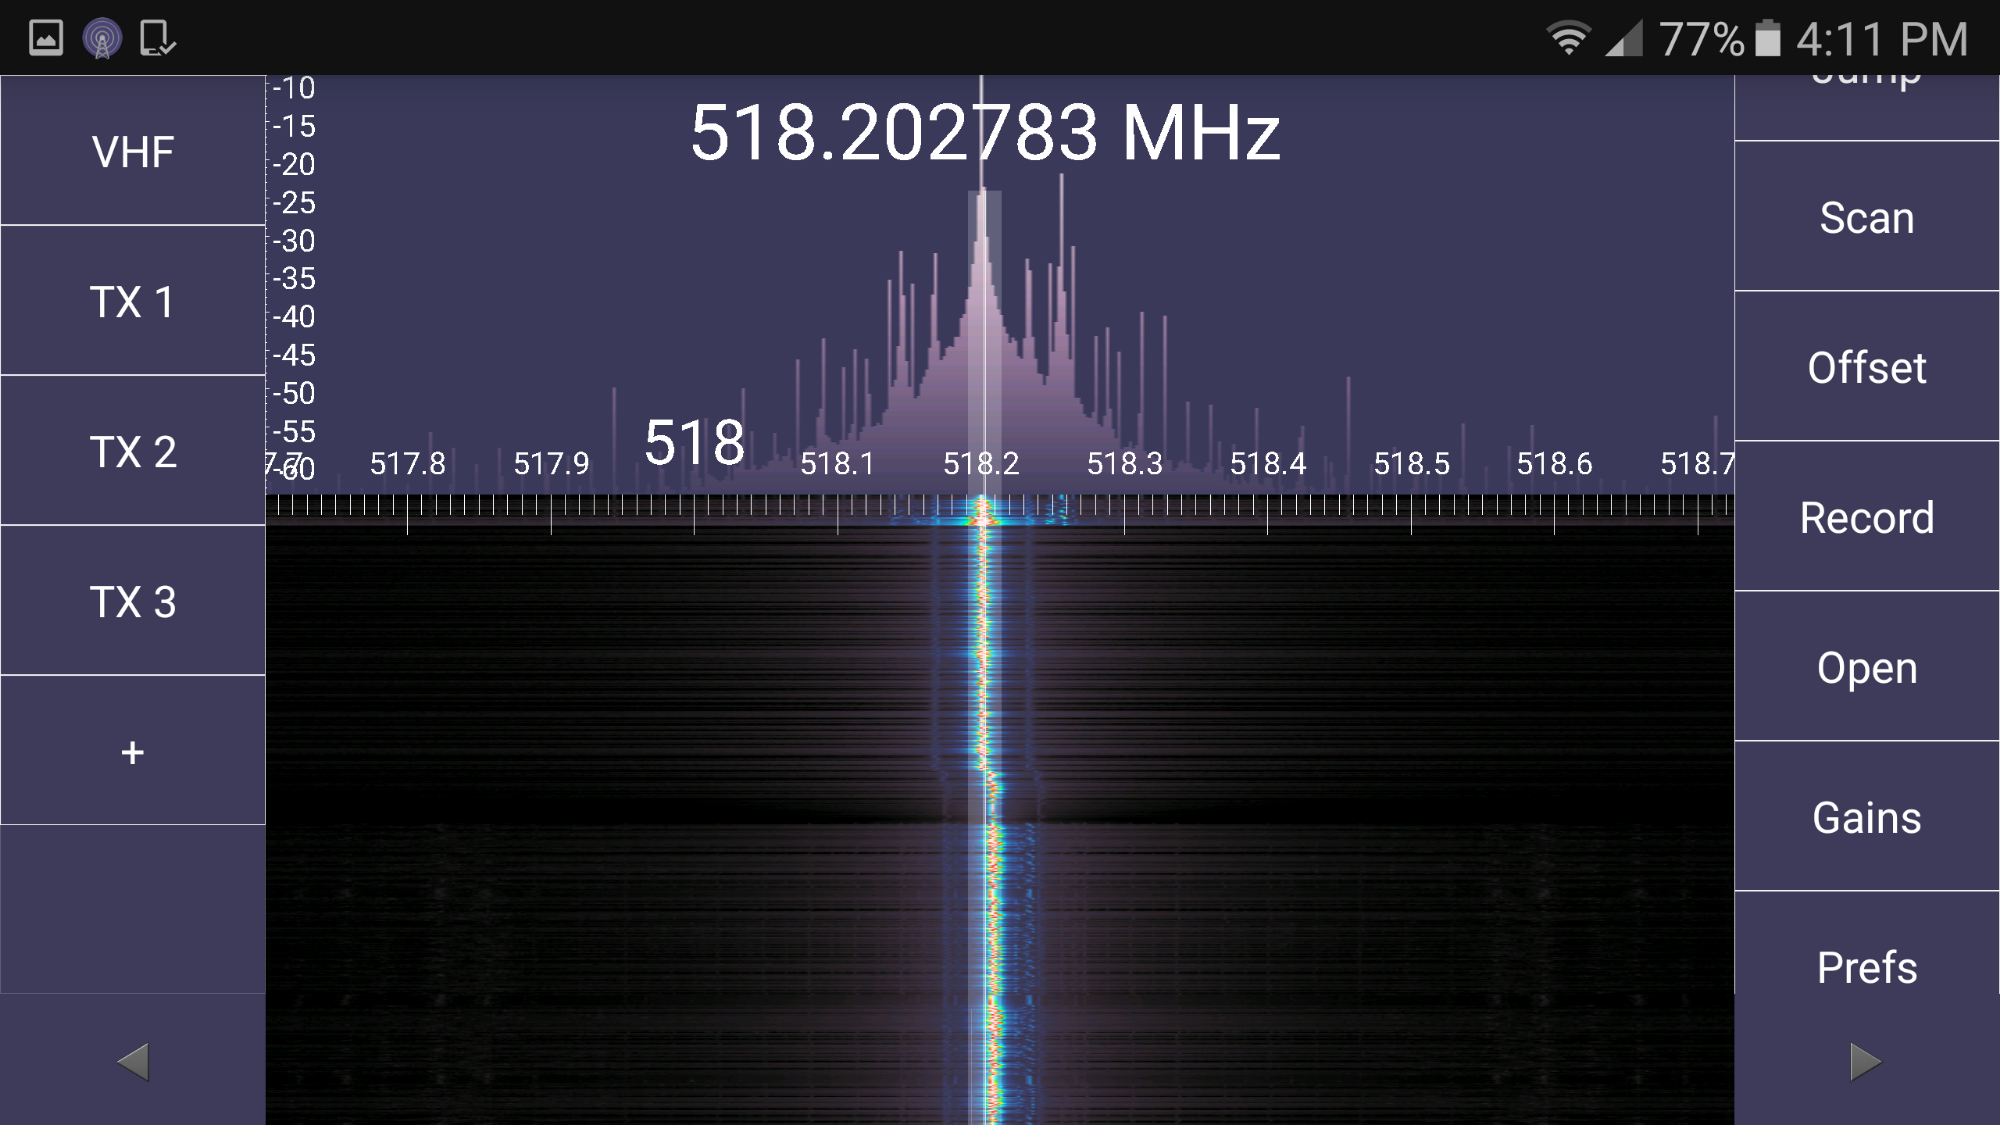
This is the a screen shot of one of the VHF Lectrosonic’s I used during my test. As you can see there are 2 competing signals above and blow my transmitter that my receiver is ignoring. The bright blue and red line shows you the actually signal that is competing against the dark purple noise near the signal. - The Sennheiser G3’s actually produced a very sloppy wide bell curve which results in tons of RF spray above and below its frequency. This would explain why you aren’t able to have too many within the same Block without running into a lot of problems.
- The accuracy of this USB dongle isn’t 100%. When scanning for local FM radio stations I noticed if I used the “Jump” feature in the app and typed in the call frequency for a radio station that the real signal may be .01~.02 above or blow what I typed. This isn’t a huge deal breaker but it is something to think about.
- This USB dongle not only can show you the RF signals in the air around you, but it can also let you listen in on the audio that your transmitter are putting out into the world. I was able to listen to all my VHF Lectrosonics and UHF G3’s on my cell phone as if it was a Lectrosonics/Sennheiser audio receiver. What real world practicality does that have…. Well not much. I suppose in a pinch you could use your phone as a backup RX if your UCR or G3 RX broke midday. But never the less, it’s still neat that I can tap into their audio signals.
To finish testing the USB dongle I brought it out with me on my last gig. The show I was on provided us with gear (which is always a good sign you’re about to use some beat up stuff.) Thank God I brought the USB dongle, the gear provided was some low end Shure rack mount gear that only had 2 buttons on it and a screen that would have been more at home on a Casio watch. The features were lacking to say the least. But because of the USB dongle, we were able to scan, find an open channel and get through 3 days without a single RF hit. In my book is $20 well spent! It’s also worth noting that if you are thinking of buying a single frequency Lectrosonic VHF unit and aren’t sure if that frequency is clean in your area before you spend money on eBay, this unit could be a nice way to hedge your bets.
UPDATE 1:
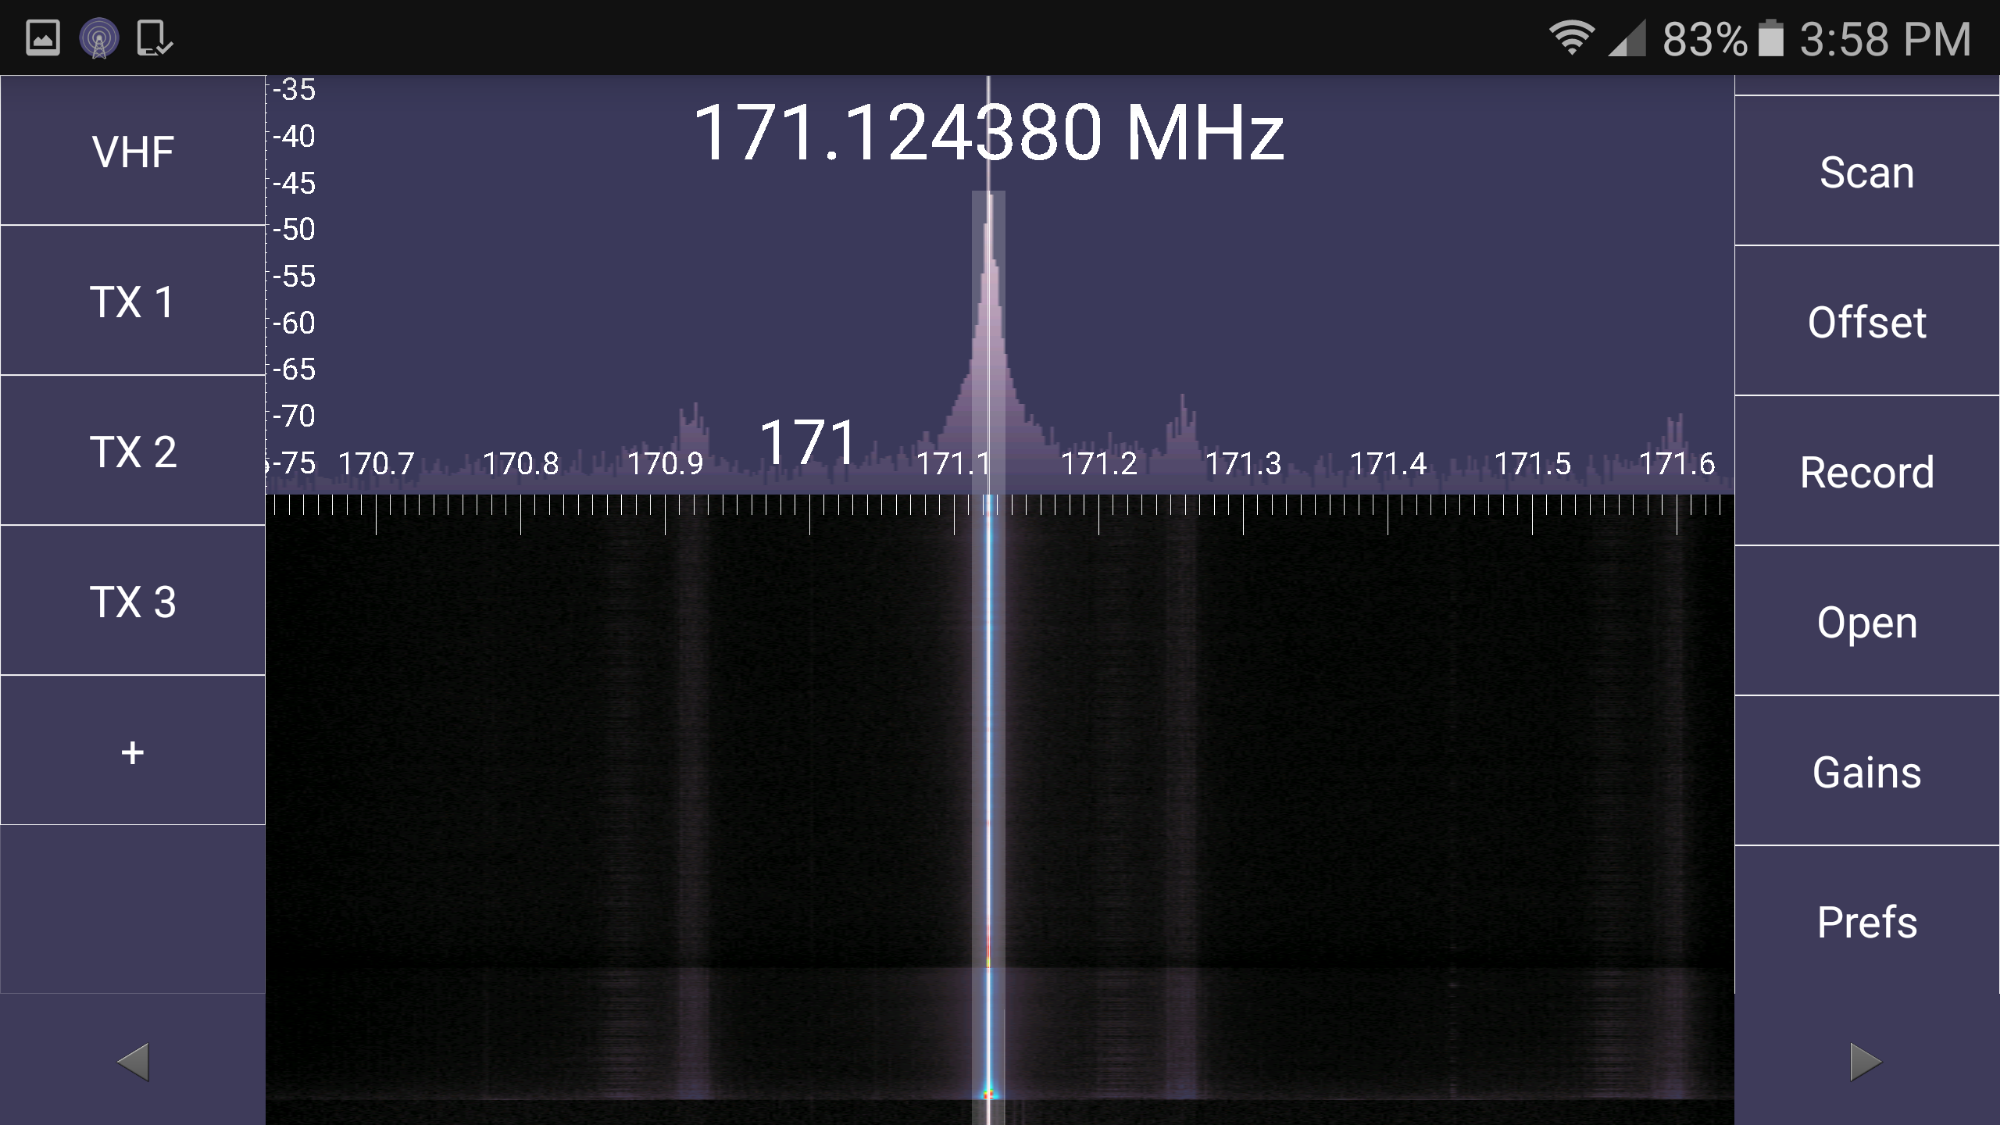
Photos have been requested of the scans from the other transmitters. Here are the some.
Audio Technica Pro 88
Sennheiser G3
 About the Author
Andrew Jones is a location sound mixer based in Los Angeles. He started in the TV and Film industry in 2004. You can email him at Andrew@HoldForSound.com

I’d love to see the Sennheiser and other transmitter curves for comparison.
LikeLike
I will add them to the post this afternoon
LikeLiked by 1 person
What was the delay in monitoring the audio off your cell phone? Is there any audio degradation? Thanks.
LikeLike
Thr delay was maybe 1/4 second. The audio quality was great. The software even features a squelch and an adjustable tracker to taken in a wider spread of the dialed in frequency.
LikeLike
The “bell curve” you speak of above is a display of the wireless’ deviation characteristic. The narrower the curve, the less audio bandwidth the wireless can faithfully reproduce. The old Lectro VHF units passed a narrower audio bandwidth than today’s Senny G3’s, which is why the “bell” is larger on the G3. A display of a Lectro RF Hybrid system would be wider than the G3’s. Limited deviation was is inherent to the old Lectro VHF units and is audible by their harsh treatment of high audio frequencies. This could only be remedied by lowering the transmitter’s input gain below an optimal level. The spikes behind the curve are probably intermodulation products as a result of the transmitter being too close to the dongle.
LikeLike