
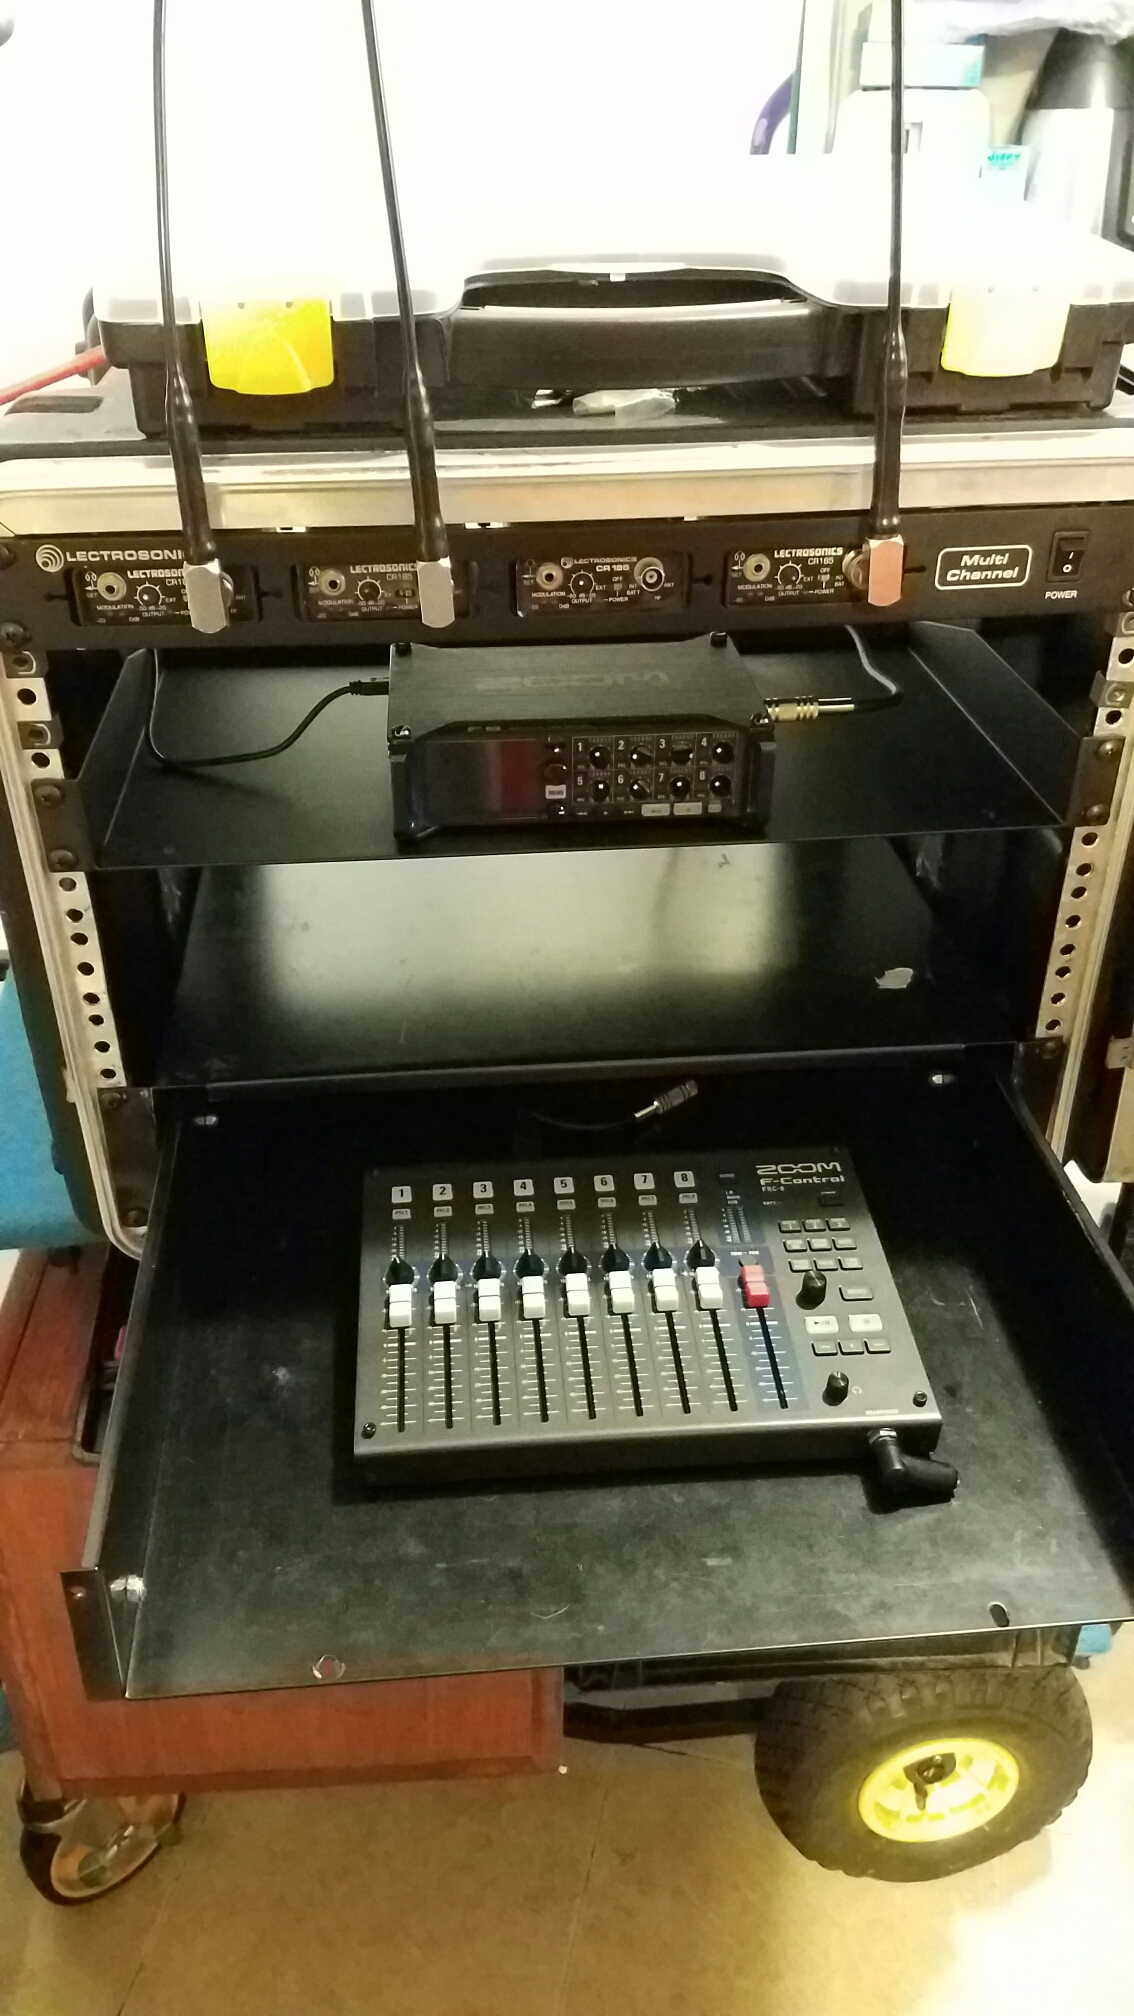
So with the advent of the Zoom FRC-8 I have become motivated to finally get around to finishing an audio cart. I decided I would build the whole concept into a single 8U SKB case. I have a lot of experience building out traditional roadcase servers for touring shows so I decided I would take that style of AV installs and use that on my audio cart. Here is a my method for creating very efficient server rack installs.
Parts / Tools:
- Your Audio Recorder
- 1/4″ 20 half inch long machine screw
- Screw driver
- 2x 1/4 rubber washers
- 1/4″ titanium drill bit
- 1U 19″ rack mount shelf
- 4x Velcro 1″x4″ strips
- Photo copier and scissors
- Black Sharpie
Step 1:

Photocopy your audio recorder. This will let yoi know 100% where the 1/4″ threaded mounting holes is under unit along with knowing how big the unit is on the 1U 19″ shelf. Cut out the audio recorder.

Step 2:
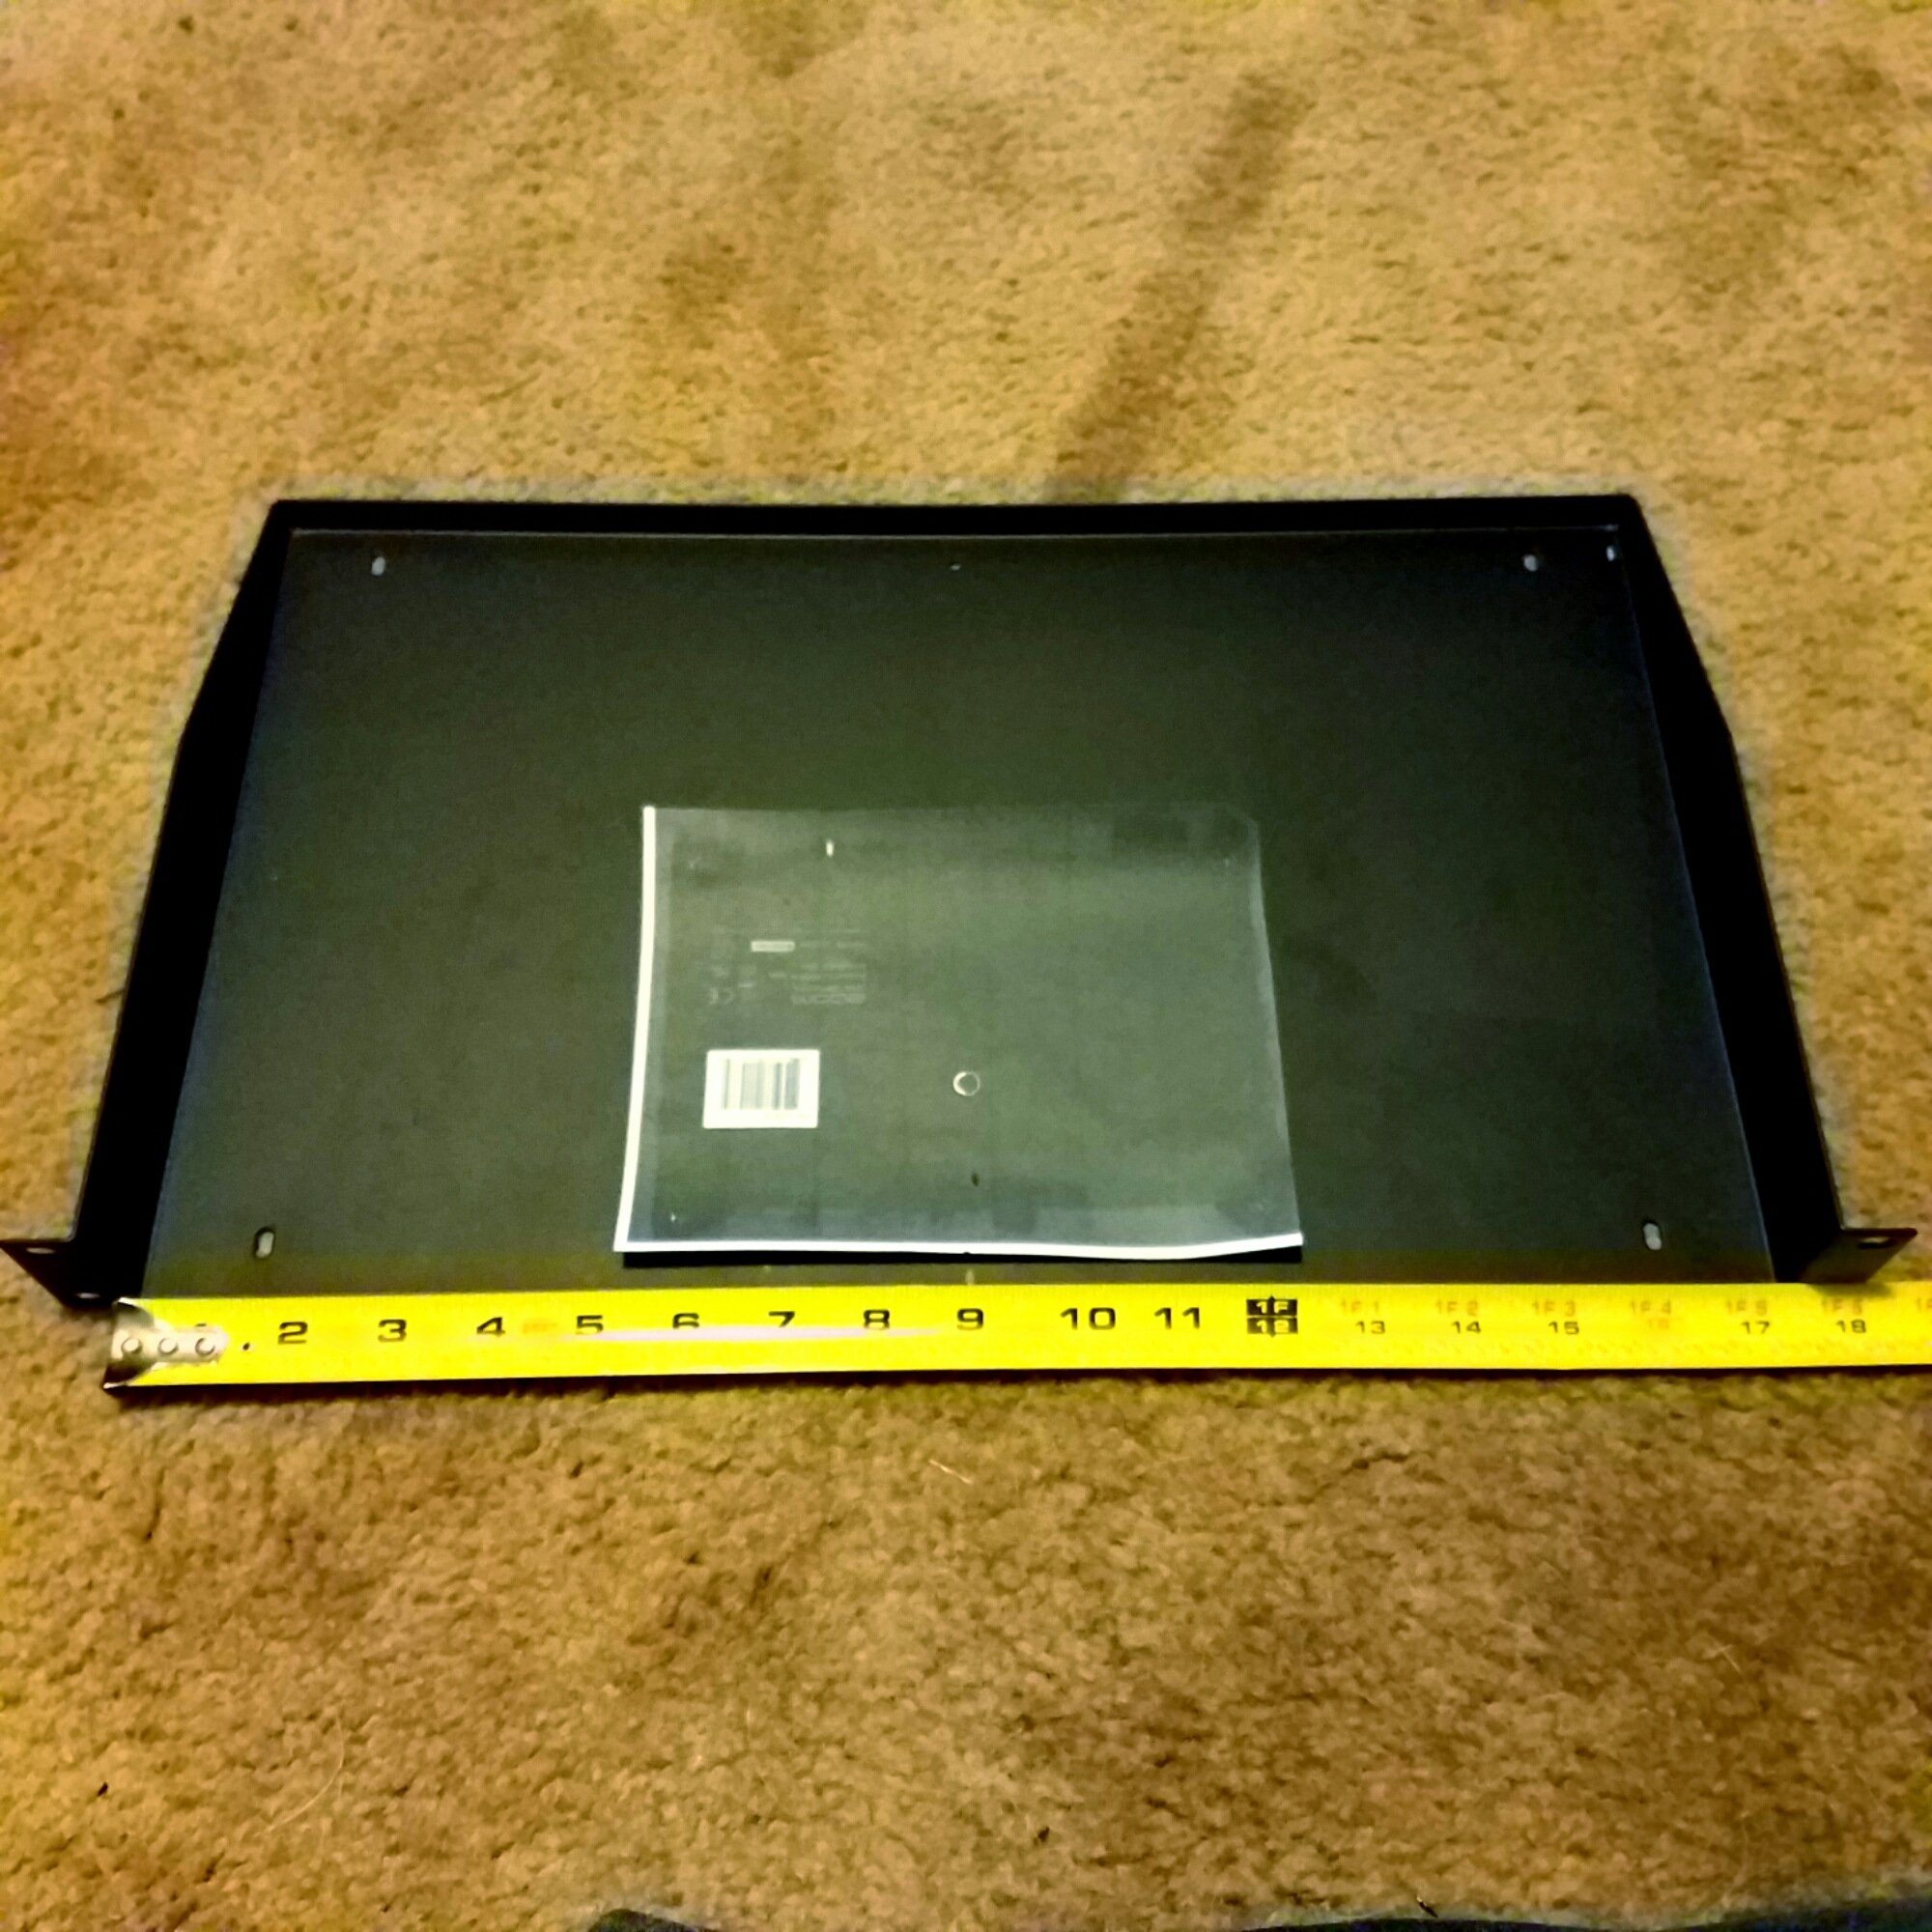
Now I wanted my unit perfectly centered. By doing the photocopy method you can layout any and all items you want on a shelf and pre-measure out all the spacing you need for cables. This method also works if you use the dimensions specs on a manufacturer’s website and cut out proxies so you can see if future purchases work with your layout.
Once you’ve placed the item(s) where you want it press the sharpie hard against the 1/4″ mount so that it soaks the paper and ends up marking the rack shelf on the other side. Do this for every mounting bracket your device uses. On a side note dead center of a traditional Mid Atlantic shelf is 8.75″ from the side edge.
Step 3:
Drill a whole where you have marks on your shelf.
Step 4:
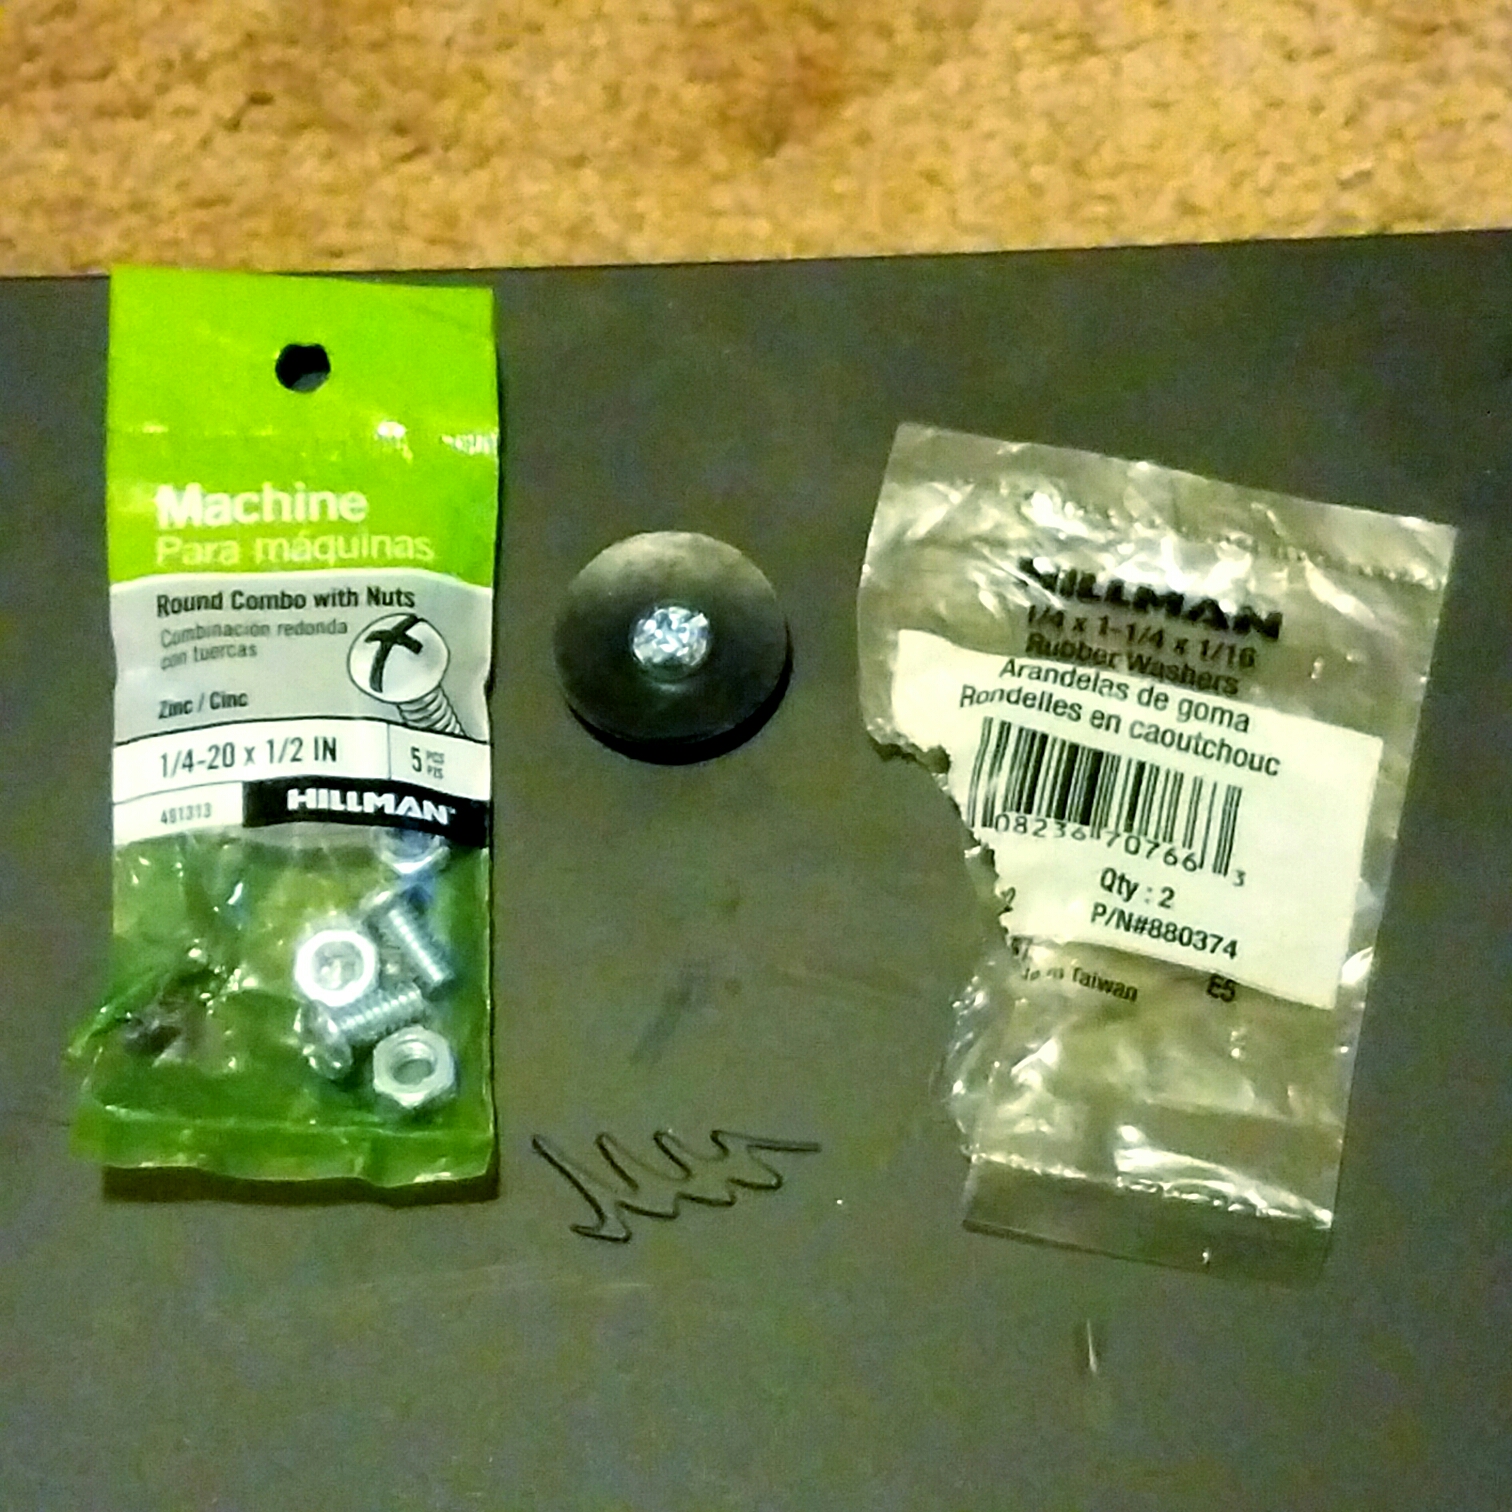
Screw it into place. I used 2 rubber washers as opposed to a lock washer. A lock washer could bend and damage the shelf if I ever reuse it for another purpose. The rubber washers will keep the screw from working itself out but not damage the shelf.
Step 5:

Now to rack mount the FRC-8 I went with 10lb Velcro. Because of the bevel on the bottom of the controller I placed a 8″ of Velcro across the top and bottom. I put the hook side on the sliding drawer and the soft loops on the control unit. This will allow me to use the control unit else where qithout causing future issues with soft surfaces. When placing the strips avoid covering up the battery compartment!
For larger controllers like the Sound Devices CL12 you may want to use 2″ wide velcro and possibly a heavier weigh capacity like 15 or 20lbs.
I hope this tutorial was helpful. I first learned of the photocopy method from an IT guy that used it when he installed wifi routers and power stripes on walls. It allowed him to know how far to space the screws for hanginf the units without having to attempt multiple times. I know alot of my readers have had their own experiences of goinf about rack mounting non-rack gear, please share them in the comments below.
I will have more tutorials coming that will talk about how I like to do cable managment in audio racks and how I am modding a rackmount antenna distro to be used with my Sennheiser G3 SMA modded recievers.
 About the Author
Andrew Jones is a location sound mixer based in Los Angeles. He started in the TV and Film industry in 2004. You can email him at Andrew@HoldForSound.com
