
Since the Deity HD-TX has just been released, I feel that the time has finally come to give a good look at the Deity Connect system as a whole. The base Connect system has been out for a while, however since then, it has undergone enough firmware changes that it truly feels as if it has reached where it wanted to be at launch. Having beta tested the units, and seen the various firmware patches, I can confirm that it has come a long way. Now, with the wireless boom transmitter, it’s time to discuss how it performed and where I feel that it fits in the market.
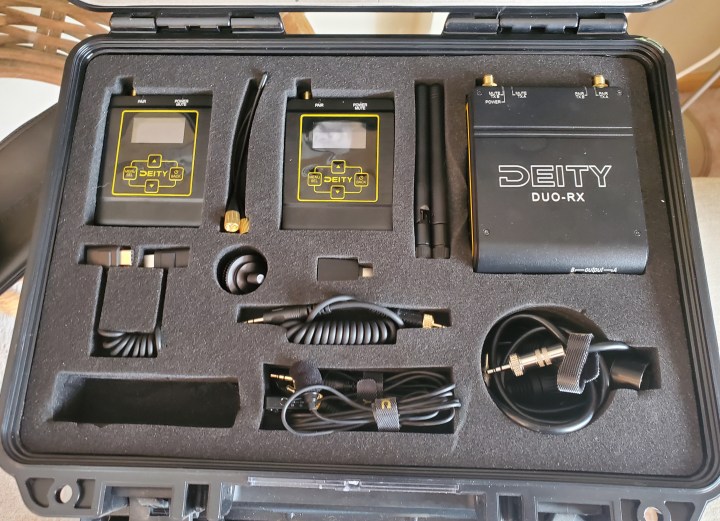
Let’s start out with the base system. In a set, you get two transmitters (the BP-TX) and a dual-channel receiver (the DUO-RX), both with internal long lasting rechargeable batteries. You also get two 3.5mm TRS to XLR male cables, a 3.5mm TRS to 3.5mm locking TRS cable, antennas, two basic kit lavs, USB-C cables for charging, and the USB-C master/slave cable (more on that later). For $669.99 USD, I’m going to call this a literal steal. As so many “bag and boom” jobs require only a boom and 2 wires, this system could have your wireless needs up and running all by itself.
But does it work? As comprehensive as that set seems, is it worth the money? My response is: Absolutely. Let me explain why.
First, the Connect runs on the 2.4ghz band. When I heard about this, I was more than skeptical. Higher frequency bands have a tougher time breaking through barriers and traveling longer distances. My mind was set more at ease when I learned about how Deity set out to combat these issues. For one, they have the system transmit on the highest power that the FCC will allow. You can even get higher gain antennas to improve performance. But most importantly the Connect employs an auto-frequency hopping technology wherein you never have to set a channel, and bad frequencies are seamlessly swapped out in real time.
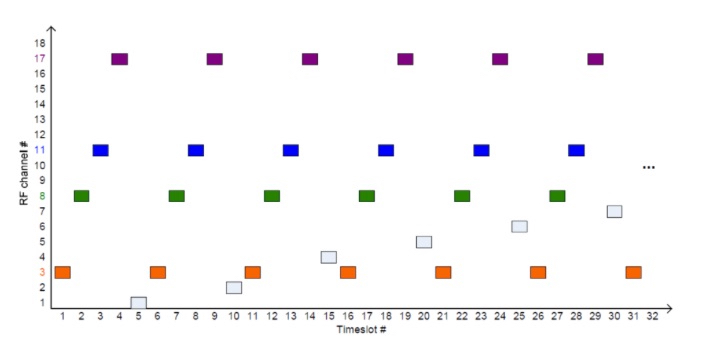
The Connect system achieves this by scanning for, and by stacking, 9 frequencies at a time. So it will constantly be checking the integrity of the signal coming from the transmitter to the receiver. When it detects a bad frequency, it swaps to the next one without any loss of signal. This is one of the killer features because simply not ever needing to scan yourself or to set frequencies on your wireless system makes this literally plug and play. Now, the downside of this is that it does cause a delay in the audio. 19ms to be exact. A lot of people seem to have a big problem with this because it will absolutely cause phasing issues in your recorder. I, on the other hand, do not have a big problem with this because any professional audio recording device has input delays on its channels.
Say that you have a hard lined boom, and then the Deity Connect system. The lavs will be coming in 19ms after your hard-lined boom. To solve this issue, you simply add a 19ms input delay to your boom track. This will cause all of the audio to line up and then Voila! No phasing. Personally, having to use my input delays is a small price to pay for never having to scan or choose frequencies.
Another design point which sets the Connect system apart in this area is that the receiver employs a quad-true diversity antenna array. There are 2 internal antennas, as well as 2 external SMA antennas. All 4 antennas are used for both channels at the same time.

The Connect signal is 24-bit 48khz encrypted audio. When you listen to it, it sounds full and rich. Also, since it’s fully digital, you don’t have to deal with the audio quality degrading as your approach the edge of range. There are different schools of thought on that. Some people prefer that part of analog radios since even if the signal is degraded, they might still get a crucial word or sentence before the static kicks in. Some people prefer to have the signal be perfect, or not there at all. The Connect definitely falls into the second scenario. You be the judge on which approach works best for you, but the main point is: the Connect certainly carries the full benefits of digital in its workflow.
The other thing that I want to mention is kind of huge. For me, it’s the main feature which sets the Connect apart from the pack at this price point. That feature is the ability to control the settings on the BP-TX (or the HD-TX, more on that soon) from the menu of the receiver. This means that both the transmitter and the receiver are really transceivers, meaning that they both transmit and receive in some way. The BP-TX is transmitting audio, but also receiving commands from the DUO-RX. The DUO-RX is receiving audio, but also transmitting commands to the BP-TX. This is made possible because of the 2.4ghz band which allows for a bi-directional link between TX and RX, since the higher frequencies can carry a lot more data than a UHF connection.


One of the best uses for this would be to remotely control the transmitter gain. Let’s say that you place your transmitter on the talent, and WHOOPS! SURPRISE! they speak louder or quieter than they said that they would. Traditionally, you would have to go back onto their bodies to adjust the input gain, but with the Connect, you can make that change from within the menu of the DUO-RX. That is incredible. This is a feature that previously you would only have seen on very very high end and expensive wireless systems like Zaxcom, and never on anything in this price range. Plus, it truly does work every time. This isn’t an instance of talking big, and not delivering. I’ve had the commands sent to the transmitter work beyond the range of the audio transmission, since the signal doesn’t need to be perfect for this to work.
I really can’t talk this up enough. It opens up a lot for people who either can’t afford a more expensive system, or who aren’t interested in them. Top marks.


As you can see above, the physical designs of the Connect system are also pretty sleek. The black and yellow might not be everyone’s cup of tea, but I like it. Kind of like a hornet. Everyone likes hornets, right? Sure they do!


The BP-TX transmitter has a metal body and feels very robust in the hand. There is a single 3.5mm TRS jack on the top for a mic, as well as a single USB-C port on the bottom for charging the internal battery. The back belt clip is smooth and has enough hold to confidently attach to an article of clothing. The antenna comes pre-curved. I asked Deity about this, and they stated that this was to help keep the antenna away from the skin when mounted to the body. As a general rule, bodies absorb radio transmissions, and 2.4ghz can be particularly susceptible to this. So I would recommend trying to keep a piece of cloth between the subject’s skin and the antenna. It does produce a noticeable difference in performance.


The receiver is actually made of both metal and plastic. There is a metal frame, but plastic on the sides. At first that kind of bugged me because plastic is less robust than metal, but then I realized that the receivers are rarely going to take physical punishment. They will be away from the talent on camera or in a bag. So making the receiver plastic is going to be beneficial because is will reduce the weight. Having a lighter bag seems to be the flavor of the day for many sound mixers.
There are the two SMA ports for antennas that I mentioned before, as well as a variety of menu buttons, a USB-C port on the bottom for charging, and two 3.5mm TRS outputs for the individual channels. By the way, you are able to set in the menu whether you want the audio to come out of one TRS output in case you are feeding both channels into a DSLR (that’s what that TRS to locking TRS is for).


Overall in size, I’d compare it more to one of my Lectrosonics UCR-411a‘s than I would my SRc receivers. As you can see above, it’s a tiny bit wider than the 411a, but solidly less long. Their face sizes are pretty comparable. The Connect definitely feels lighter in the hand though, which is helpful in reducing bag weight.
Speaking of a bag, it is clear how much the DUO-RX is designed for bag use due to the top down ergonomics. Unlike something else in this price range, a Sennheiser G4 system isn’t going to have its menus and screen visible when mounted in a bag.
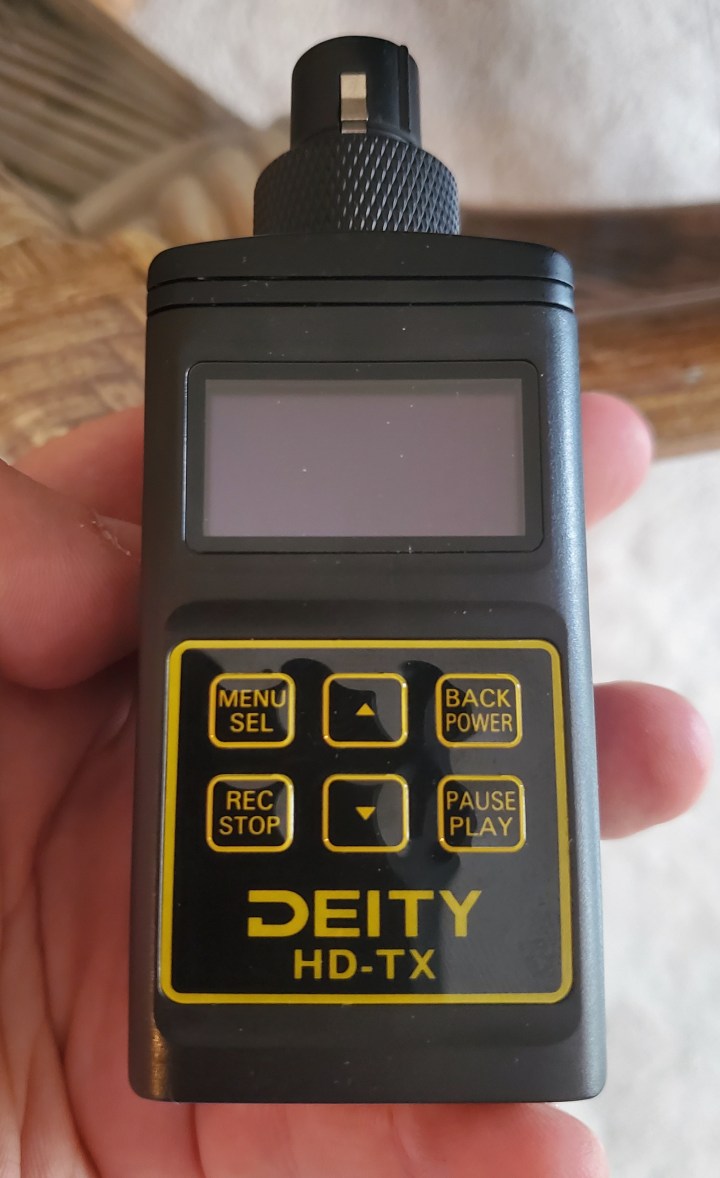
Well well, what do we have here? Looks to me like the long awaited plug-on transmitter, the HD-TX. Crafted from a similar metal frame, and a familiar front layout, the HD-TX sports a similar screen, similar menu, and new button layout as compared to the BP-TX. It is capable of providing 48v phantom power through its XLR port so that you can use it for either a dynamic hand held mic, or a wireless boom.


On the side, you can see the USB-C port for charging, a headphone jack, and a Micro-SD card port. Why a memory card port? Because this puppy can self record! A boom transmitter that can also record is very attractive to those who have eyed the Zaxcom or Audio Limited systems. That being said, due to Zaxcom’s patents in the US, the HD-TX can only be in transmit mode or record mode. With the international firmware, however, it is able to transmit and record simultaneously. Recording is simple and can be done with the press of two buttons on the front panel.


Something else that you might have noticed from the photos above is the little 3.5mm TRS jack beside the XLR plug. With the HD-TX, you are able to plug a lav straight into the transmitter, so that you can use it as a body pack. The included the belt clip case makes that a lot easier since a plug-on isn’t usually your first choice for wearing on the body.


Above, I have the HD-TX compared with my Lectrosonics HM. As you can see, the HD-TX is larger in all dimensions, however it has that input jack for a lav. If you want to do that on the HM, you’re going to need an adaptor for the XLR port like the Ambient EMP5s, pictured on the right. That adds a lot of height to the HM, but if you need it, then you need it. Wouldn’t it be nice though, if you didn’t need the adaptor? This extra feature helps the HD-TX standout.
Just like with the BP-TX, the HD-TX creates a bidirectional link between itself and the DUO-RX, so you are able to control all of the settings on it from the receiver menu. Also again, there is no setting the frequency. Once paired with a channel on the receiver, the HD-TX is ready to go right when you start it up. Easy peasy.
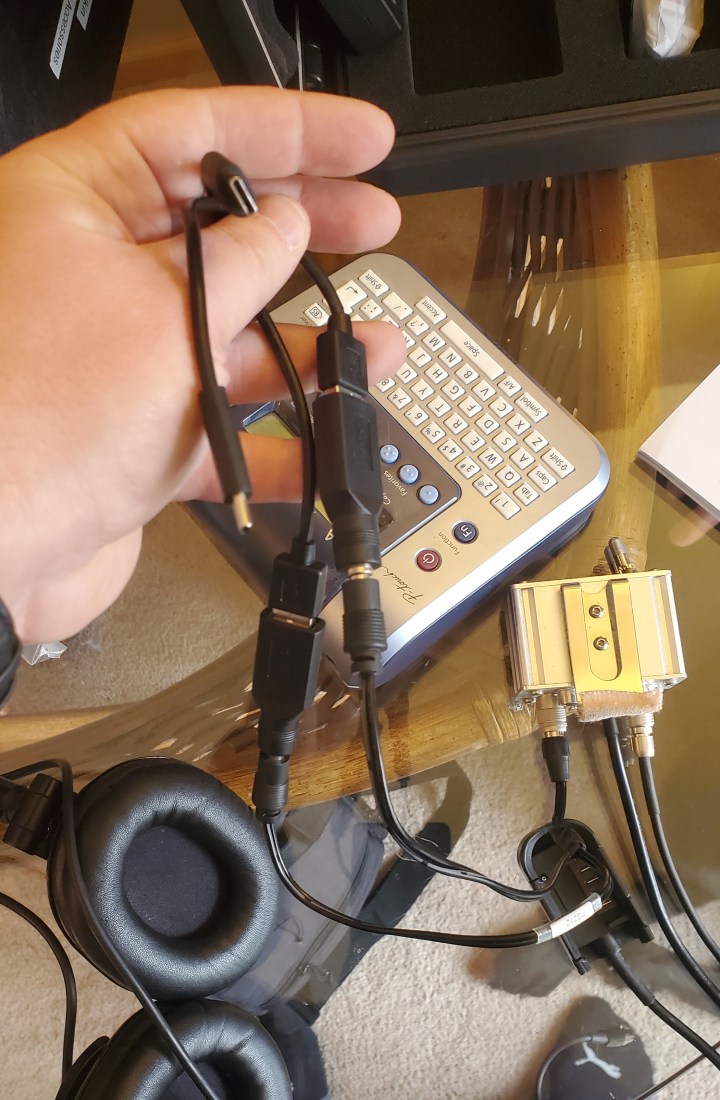
Let’s talk batteries. Now this crazy Franken-cable is what I have been using to test the DUO-RX receivers in a bag. I have an Audioroot BDS, with a hirose to dual 2.1mm DC cable, which I got from my Lectro bag. I have 2.1mm DC to USB-A female adaptors, and then short USB-A to USB-C cables to feed power into the receivers. Works like charm, even though long term, I would like to get hirose to USB-C cables made. Fewer points of failure would be optimum.
Even though the DUO-RX receivers do have a solid internal battery inside, who wants to keep taking the receivers in and out of the bag to charge them. We like to leave the bag built, in an ideal world. I’m glad that the internal battery is in there, in case I wanted to use them as a camera hop, but in the bag, I want them to be connected to the BDS.
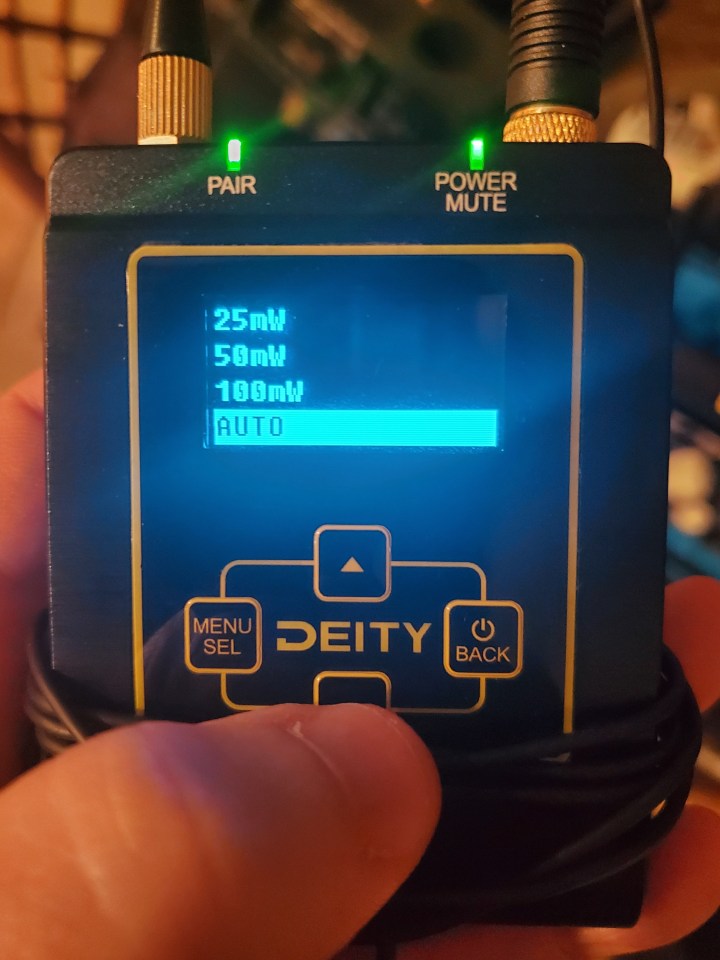
Deity lists the battery life as around 10 hours if the RF output is set to maximum, with a 1 hour recharge time (all of the Connect line supports quick charging). I would say that my tests have shown that to be more or less accurate. In high traffic areas, I have noticed the battery running down a little bit faster due to the system having to hop frequencies more often. However, to add additional run time, the transmitters and receiver are able to change their RF output strength.
The options are 10mw, 25mw, 50mw, 100mw, and AUTO. Now as with the internal battery, it’s nice that 10mw option is there, but don’t use it. When I tried it, my performance took a big hit. It would only work if you were going to be very close to the talent and wouldn’t be moving at all. But since unexpected situations occur, I’d rather have a safer output power. Besides, if you want to extend battery life, but are worried about needing a stronger transmission if the situation changes, you can select AUTO. Similarly to the frequency hopping, this setting starts at a low transmission power and then boosts it to the next step when the signal starts to get low. Because of that 19ms delay, it can make the switch without you ever knowing. So you end up not spending the whole day at max power. That will for sure get you over a day of run time on the batteries. This is very helpful since the batteries are fixed and non-removable.
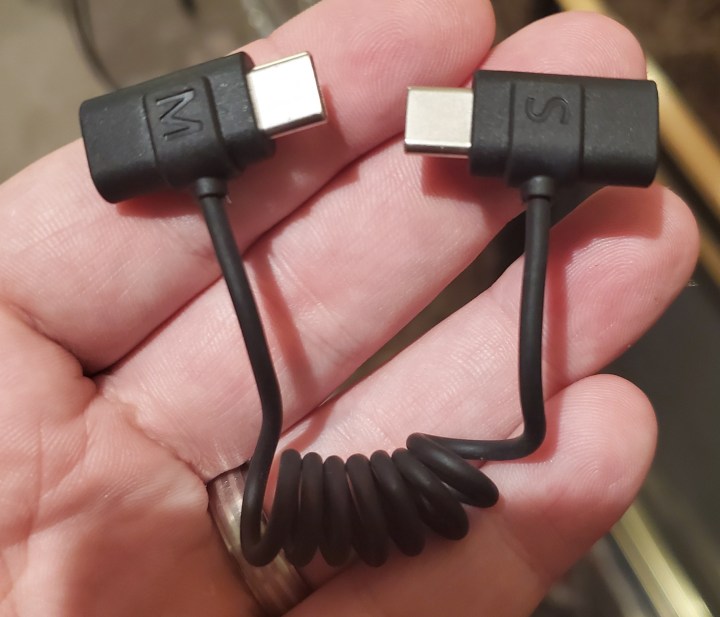
Inside of the kit, you get one of these Master/Slave cables. Deity doesn’t call it that, to my knowledge. I just don’t know what else to call it because I’ve never encountered anything else like it.
The frequency hopping technology is constantly mapping the whole 2.4ghz spectrum and choosing the next channels for the receiver. But what happens if there is more than one receiver in operation at the same time? They would inevitably both choose some of the same frequencies to stack ahead, and then when it came time to jump over to said frequencies, they could both do it at the same time and cause interference. To prevent this from happening, the Master/Slave cable connects the receivers together so that they can communicate and be sure to choose different frequencies than each other. The “M” side of the cable goes into the USB-C port on the primary receiver, and the “S” side goes into the secondary receiver.
Each side of the cable has passthrough USB-C ports so that you don’t lose the ability to feed power in. You can technically chain 3 receivers together for a total of 6 audio channels, but it is not recommended since there are only so many open 2.4ghz frequencies in any given area. Since the receivers are stacking 9 frequencies for each channel, that would be 54 for all channels. Unless you’re in a really clean rf environment, it’s going to causes issues if the third receiver can’t find any more clear, unclaimed frequencies. Because of this, it is recommended in most cases that you stick to only 2 receiver units at the same time. That’s why that 3.5mm TRS jack on the HD-TX is so great. If you can only typically use 4 channels of Connect wireless, and you need 4 people wearing a lav, you can switch to hard wiring a boom, and then use the HD-TX as a lav transmitter.
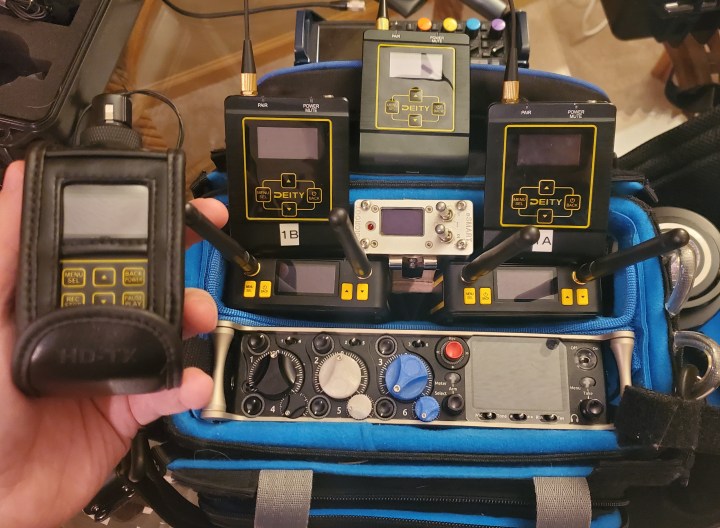
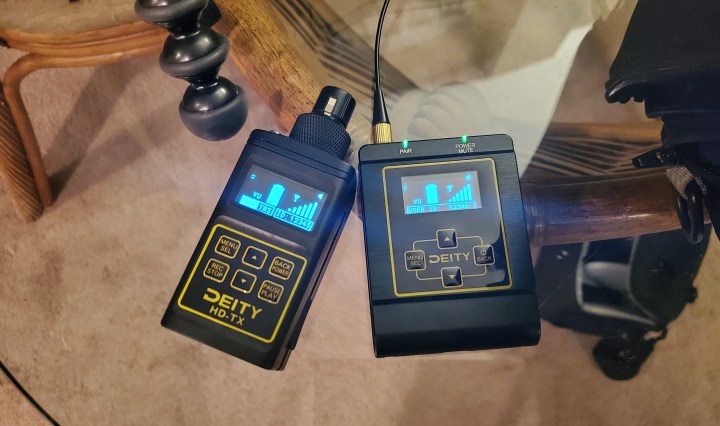
So what you have here is a great little kit, that seamlessly works and is packed with features. If you’re curious about how it sounds, then scroll back up to the top. My video review was recorded entirely with the Connect system, and you will hear the BP-TX transmission, the HD-TX transmission, as well as the HD-TX internal recording. I think that it all sounded great, and the results speak for themselves. Below are photos of the HD-TX, the DUO-RX, and the 833 menus to show the gain staging that I used in the video to achieve a healthy ISO track.


Frankly, the Deity Connect line is ambitious in the best way. Instead of simply churning out another wireless set with the same features and the same approach as many of the competitors, they opted to enter the field hitting the ground running. The 2.4ghz frequency hopping tech is something that in general should push the competition to innovate (yes, I’m looking at you Zaxnet). The ability to control the transmitter from the receiver menu is amazing. So many of these features can’t be found anywhere near this price point. Until the Connect, they were the stuff of lords and kings. Now, with newcomer Deity Microphones pushing the limits, it will be great for everybody. Competition breeds innovation, and innovation is good for everybody.

Jared Elkin is a professional sound mixer located in Minneapolis, Minnesota.
